Tuesday, June 30, 2009

First Squash from the Garden


I grew my first squash! I have taken the two really sunny garden areas of the yard and decided to convert them to vegetable gardens because I found myself really frustrated trying to grow landscaping plants in the full on Texas sun. Even plants that advertise themselves as full sun seem to need a bit of a break from it here in Texas. However the vegetables seem to be doing really well. I have decided that I really like summer squash plants. The plants themselves are beautiful, with their big flat green leaves, and they seem to be very productive. Here are some little zucchinis still on the vine.


Today we are having an unusual summer rain, and so I turned off the AC and have all the doors open, enjoying the beautiful coolness. I cooked my fist squash up for lunch using this recipe.

Summer Squash with Lemon and Basil
3 tablespoons extra virgin olive oil
2 tablespoons lemon juice 1 teaspoon lemon zest
2 tablespoons fresh basil, chopped
1/4 teaspoon sea salt
2 large summer squash

For the vinaigrette, in a small bowl, mix together olive oil, lemon juice, lemon zest, fresh basil and salt. For the squash, slice into large rounds. Warm a 10-inch skillet (cast iron is best) until very hot. Place squash in pan and sear over high heat, until browned, 2 to 3 minutes. Flip onto other side and sear additional 2 to 3 minutes, until both sides are browned. Place squash on a large platter. Spoon vinaigrette over squash. Serve warm. (I added some fresh paneer cheese which I I added to the skillet once the squash was cooked and browned for about a minute)


The other summer highlight in my garden in the Pink Phlox that blooms in the front yard. It always dies back in the winter and puts forth new leaves in the spring. By summer I have a glorious display of pink frothy blossoms with the most amazing subtle honey scent that fills the whole front yard. I always get compliments on them from the neighbors.


Friday, June 26, 2009

Paneer Cheese

I have discovered the most amazingly easy way to make a fabulous fresh cheese. My friend Pam mentioned that she had learned how to make Paneer cheese and loved it, and so being the curious person I am, I had to go find a recipe and try it. I had so much fun and the result was delicious. So here is the recipe.

Paneer Cheese
8 cups of Whole Milk (½ gallon) (I used Skim and it worked fine)
1 tsp. Salt
3 tablespoons Lemon Juice (½ medium sized lemon squeezed)

In a large pan bring milk, salt, and cumin just to boiling; reduce heat. Simmer, uncovered, for 5 minutes. Remove from heat. Stir in lemon juice. Let stand 15 minutes.

Line a large strainer or colander with several layers of 100-percent cotton cheesecloth. Strain mixture; discard liquid. Gently squeeze the cheesecloth to remove as much liquid from the curds as possible. Wrap cloth around curds. Place wrapped curds in a large strainer or colander and put a weighted bowl on top to help press out any additional liquid. Let stand, covered, in a refrigerator for at least 15 hours.

Remove curds. Discard liquid. Form curds into a flat rectangle or press into a large bowl to shape. Refrigerate, covered with plastic wrap, until well chilled. Store in refrigerator, tightly wrapped, for up to 3 weeks.  

I actually rinsed the outside of the curds wrapped in the cheesecloth with a little cool water to help me be able to squeeze them. I don’t know if I just squeezed really hard or what, but my cheese set up enough to eat in about 3 hours, and had a wonderful fresh mozzerella kind of texture. The flavor is a very subtle lemon scented.

I ended up making an spicy oil with 2 tablespoons of olive oil, ¼ tsp hot chile powder, and ¼ tsp garlic salt to drizzle over the little cheese round I eventually ended up with and the result was amazing.

Anyway, I got very excited and I think I will try my hand at some other cheese making. I did some research on line and found that cheese making kits are as close as your next Austin Farmers’ Market. Marc Kuehl of Brazos Valley Cheese (raw cow’s milk- made in Waco, Texas) has available to the public a cheese-making kit with rennet, booklet, cheese cloth, etc for making several pounds of cheese. He is at the markets both Wednesday at the Triangle and downtown on Saturdays. www.austinfarmersmarket.org for details. The milk you can get from Remember When Dairy on Saturdays at the downtown market.

Brazos Valley Cheeses - Homestead Heritage Farm. 608 Dry Creek Rd., Waco, TX 76705. Marc Kuelth - Marc is a quality cheese maker from near Waco, and graces the market with more than 30 different types of gourmet cow's milk cheeses through the season (you'll have to choose between more than a dozen each week). From brie to mozzarella, from cheddar to parmesan, he's got your taste buds satisfied. 512-284-0196, marc.kuelth@juno.com.

In addition to the fun you have making it, the cost of milk is a third of what you would for the cheese itself.

Thursday, June 25, 2009

Medieval Macabre Poster Final


Well, we finally came to a consensus on the Medieval Macabre poster. The Producer came over to my house and sat with me as we went through a bunch of stock images until we finally found an image of an iron skull which seemed to express the characteristic feeling that she wanted for the show.

Here is a little bit about the process of creating the poster. I first put the stock image in place exactly as it was, and came up with a type solution which I reused from my earlier design of this poster with the Dance Macabre.


I then cut a square piece of the texture from the main part of the skull and created a repeating pattern from it. To do this my typical process is to cut a 500x500 pixel or larger square of the texture I want to use. I then make a second copy of the texture onto another layer. On the first layer I run a high pass filter with default settings to even out the lights and darks in the texture. I then apply the second copy of the texture as a Color mode layer on top of the High Pass version to return some of the original color to the texture. I merge these two layers together, and then use an Offset filter to offset the pattern by half of its length and width. Then, I use the clone tool, or healing brush tools to clone over the sharp edges which are now offset to the center of the texture. I then run the Offset filter again with the same values, and VoilĂ , I have a tiling texture.

Once I had my texture, I created a new copy of the layer with the skull image and painted in the rest of the tombstone by using the eyedropper tool to select values from the skull, and the airbrush to paint the lines. I set up a second layer above the layer I was painting on and filled it with the skull texture set to Overlay mode. I then held down the option key and clicked the line between the layers so that the layer with my texture only showed through where I had painted the rest of the tombstone. I then pasted the original skull back in another layer and faded the edges so that my painted layer and the original skull image flowed together seamlessly. After a lot of painting, and some color adjustments, I was able to achieve an extension of the original skull image that looked fairly realistic.

I then took my type layers and applied a deep, hard chiseled Bevel and Emboss layer effect, and also applied my same skull texture as a Pattern Overlay layer effect (also on Overlay mode). This helped bring the text and image together so that they looked like they were from the same world and the type did not overpower the image.

Anyway, the poster ended up being fairly quick to produce once we had settled on a design. I was able to finish the image and apply it to all the promo materials in about half a day. The best part is that the Producer loves it. One of the board members for the group told me that he loved how it looked dark and evil, and was chortling in glee while he said it. I love making people happy with my art.

Sunday, June 21, 2009

Textiles from the V&A

On our trip to Egypt in April we had a day in London in transit and we were finally able to see the textile galleries in the V& A. So here are some of the fun pictures we took for all of my costumer friends.

Stamped, Slashed and Abraded Satins, late 16th and early 17th century


A Pair of Episcopal Gloves, Spanish, Second half of the 16th century
Couched gilt thread on knitted silk


Printed Textiles produced for Wall Decoration, Second half of the 16th century
The pattern is derived from contemporary velvet patterns. The example on the left has been lime-washed, block printed in two colors and sprinkled with crushed mica (it still sparkled), That on the right appears to be stenciled, and may perhaps be a later version of the same design. From the Forrer collection. said to have been acquired in Paris.


Saturday, June 20, 2009

Egyptian Recipes

Jim and are throwing a party today to show a bunch of our friends the pictures we took in Egypt. And so I am getting into the spirit of things by cooking a full Egyptian menu. I thought I would share some of the recipes here that I liked. Most of these recipes come from the EgyptDailyNews.com with some alterations from me.

Shawerma
1/4 cup vinegar
1/4 cup olive oil
3 tbl lemon juice
3 cloves minced garlic
1/2 tsp cinnamon,

1/2 tsp allspice,

1/2 tsp nutmeg
1/2 tsp pepper
1/2 tsp dry fine oregano

1/2 tsp salt
2 bay leaves
2 cups yogurt
1 tomato
1 1/2 lbs of lamb, chicken or beef

Combine the first 8 ingredients in a bowl and marinate the lamb (or beef) in it for 6 hours. Grease a saucepan with oil and heat. Add the marinated lamb (or beef) and cook until tender. Serve it with Pita bread and tahini sauce (see below), mint leaves, tomatoes and onions. (Alternatively, you may hook the pieces of meat on small wooden skewers and grill on charcoal until tender).

Tahini Sauce
3 tbl sesame tahini
1 minced clove of garlic
1/2 tsp salt
3 tbl lemon juice
3 tbl water, or more
1 tbl plain yogurt.

Place tahini, garlic, salt and lemon juice in a small bowl and mix with a spoon Gradually add water until tahini becomes  smooth. Add chopped parsley and mix well.

_________________________________________ 

Kofta
2 lbs ground lamb, or shredded chicken
1 cup mashed potatoes or thick white sauce
1 Onion chopped
tblsp crushed bread crumbs (optional
Salt and pepper to taste
2 eggs
Bread crumbs
sun flower oil

Place in a bowl working with your hands to form a consistent ball like the dough. Start shaping into small balls and press to form circles (hamburger size) that are ½ cm to 1 cm thick. Refridgerate for 15 minutes.  Beat 2 eggs and add salt and pepper. Place Kofta in eggs until both sides are properly covered. Cover with bread crumbs and fry in sun flower oil over medium heat for about 2-3 minutes per side.

 _________________________________________

Taamiya “Falafel’
1 lb. fava beans, skinned and split
4 tsp. cumin, ground
1/2 cup dried chick peas
2 tsp. coriander, ground
1/2 cup parsley, finely chopped
2 Tbs. salt
1/2 cup coriander, fresh and finely chopped
1/2 tsp. pepper

1 cup green onions, finely chopped
2 tsp. baking soda
2 Tbs. dill, fresh and chopped or 1/2 tsp. dry dill
1/2 cup sesame seeds, roasted
8 cloves garlic, finely chopped
vegetable oil for deep frying  

Soak fava beans and chick peas in water overnight, or at least for 15 hours. First grind chick peas until very fine, add beans, fresh parsley, fresh coriander, green onions, dill and garlic. Grind altogether in food processor until a very fine paste is obtained, adding 7 or 8 tablespoons of water. Keep the water when grinding to an absolute mininmun. More water makes gringing easier but makes the patties fall apart in frying. Add ground cumin, ground coriander, salt, pepper and mix well by hand. Refrigerate for an hour to make it firm. At this stage the paste can be frozen in small packets. Thaw when needed and add baking soda 1/2hour before frying.

With wet fingers shape into walnut size balls 1 1/2" in diameter (or use cylindrical steel spring mold*), flatten to form small patties, dip one side in sesame seeds and deep fry in hot oil. Turn over until well browned and crisp. Drain on paper towels. If you get too much water and your patties are falling apart you can use cheese cloth to strain the paste, or you can mix in some breadcrumbs to give it a little more body. If you make the patties and allow them to dry for a little bit before you actually fry them, that helps as well.

Serve hot with pocket bread. Side dishes of Tehina dip, green onions, tomatoes, radishes, pickles and chopped parsley are usually served with Falafel. Yields 55 patties

 _________________________________________

Egyptian Kusherie
1 cup lentils
1 quartered garlic clove
2 tablespoon cumin
6 ounces small elbow macaroni, or vermicelli broken into 1 inch pieces
2 cups dry rice
4 cups chicken stock or vegetable stock
1 tsp butter
1 tsp olive oil
salt and peper to taste

Boil lentils in water (about 4 cups) along with 1 clove garlic cut into quarters, and 1 tablespoon cumin until cooked (15-20 mintes), drain and set aside. Boil the pasta until done accoring to the package instructions. Cook the rice in the chicken stock add salt if the broth is unsalted. Add the butter and olive oil to a large skillet. Add the pasta and saute, then add the rice and lentils, and 1tsp cumin and saute until warmed through. Salt and pepper to taste.

Kusherie Sauce
1 (15 ounce) can tomato sauce
1 dash lime juice
2 minced garlic cloves
1 dash yellow mustard
2 tablespoons vinegar
pinch of sugar
salt and pepper to taste

In 1 tablespoon oil heated over medium heat add 2 cloves minced garlic and a dash of salt, stir and fry about 2 minutes. Add a pinch of sugar and the tomato sauce and mix well. Add the vinegar, a small squirt yellow mustard and a dash of lime juice. You can adjust the amounts according to your personal taste but it should have kind of a slight puckery bite.

To serve, put the kusherie onto a plate and add a small amount of sauce to the top. A little goes a long way, and you can always add more according to taste

_________________________________________

Basboussa
Sugar Syrup 
1 cup sugar
1 cup water 
1 tablespoon clarified butter
2 talbespoons lemon juice

Put ingredients for sugar syrup into a pot and bring to a boil. 
Add 1 tablespoon clarified butter. Simmer for about 15 minutes and cool.

Basboussa cake
2 cups semolina flour 
1 cup sugar 
1 cup coconut flakes 
1 cup clarified butter 
1 cup milk 
1/2 talbespoon plain yogurt 
1/2 cup slivered almonds, or 1/2 cup chopped hazelnuts

Mix the sugar, coconut and semolina flour. Put the milk and butter in a pot and bring to a boil. Add the semolina mixture to the milk and butter, plus remaining ingredients and mix well.
Coat a 8x8 baking pan with butter. Pour into a baking tray 1/2 inch high and distribute evenly. Bake at 350 degrees for about 35 minutes until golden-yellow. Remove from the oven and distribute slivered almonds or chopped hazelnuts over the top of the backed Basboussa. Press the nuts gently with your finger. Leave the Basboussa to cool for 1 hour. Soak with the cold sugar syrup. Bake at 200 degrees for 5 minutes until golden-yellow. Cut into pieces and serve warm or cold. 


 _________________________________________

Baklawa
Syrup
3 cups sugar
1 cup water
1 tsp lemon juice (to stop syrup from crystallizing


3 tbsp rosewater
2 tsp butter

Pastry
3 cups finely chopped pistachio nuts
3/4 cup sugar
3/4 tsp cinnamon
1 lb package phyllo pastry/strudel pastry
1 pound clarified butter, melted


Make the syrup well ahead of time as it must be cool by the time it is used. Combine sugar and water, bring to a boil, add lemon juice and continue boiling for 3 minutes. Add rosewater and butter and remove from the heat. Cool to room temperature.

Carefully pick between the nuts for stray shell pieces. Combine chopped nuts, sugar and cinnamon and set aside.

Brush a 40 x 28 cm (13 x 19 inch) baking pan with butter. Lay down two phyllo sheets and brush them with butter. Cover with a single sheet and brush it with butter. Continue until slightly more than half the package is used. Spread with the filling. Cover with a phyllo sheet and brush with butter. Continue as before until all phyllo is used. Brush the top sheet well with butter.

Slice through the top layers with a sharp knife, forming diamond shapes - bite size or larger. Bake in a 450F oven for 10 minutes. Lower heat to 375C and bake for another 30-40 minutes or until lightly golden. (Carefully watch during last stage of baking as you to not wish do over-brown.) Remove from the oven. Slice through all layers, pour on the cool syrup and set aside.

Serve at room temperature. Will keep at room temperature for 5-7 days. Freezes well.

 _________________________________________

‘Karkadeeh’ - Hibiscus Drink
1 cup hibiscus petals
2 cups sugar
Large pot of water

Place hibicus petals in cold water. Bring to a boil for 2-3 minutes. Remove pot and strain liquid through a very fine sieve or filter paper. Return petals to the pot, add fresh cold water to cover, and bring to a boil, again filtering the juice. Repeat until karkadeeh loses its reddish hue. Discard petals and sweeten while juice is still hot. 


Thursday, June 18, 2009

Medieval Macabre Poster Ideas

I'm trying to create a poster for our fall show and struggling a bit. Here are the ideas so far. Unfortunately the producer and director really want an old fashioned look, and that is no longer my forte. I'm so into the photorealism now. So I made a photorealistic one which I thought was awesome but didn't make them immediately jump for joy. Anyway, I have to take a break from it. Maybe tomorrow inspiration will strike.

Monday, June 15, 2009

Casting the Roman Breastplate

Jim and I were finally able to cast the Breastplate in Plaster tonight. Here is a documentation of our process. First I painted the model with Amaco plaster release.

Then I built up some wall of clay to hold in the plaster in places where it might run.

Jim helped me mix the Hydrocal plaster (purchased from Armadillo Clay in Austin). It's a much harder version than the normal plaster you can get at a drug store, which is good for mold making. For a long working time we mix 1lb 2oz of water to 2lb 8oz of water. This starts out as a fairly liquid mixture and then is workable for about 15-20 minutes in summer temperatures. We always wear masks when using plaster because it is dangerous, and always mix the pater into the water.


The first layer of plater we paint on with disposable brushes. As it begins to thicken you can pour it on and then use the brush to spread it. By the end when it gets really thick you can work it with your hands like clay.

In between the layers of plaster we put layers of plaster bandages for extra support. You can also use burlap for this. We just happened to have the bandages handy.

For the final layer, you can dampen your hands slightly and smooth it to a nice finish which will be more pleasant as you work with the finished mold.

We will let it dry overnight, and unmold it tomorrow morning. Hopefully everything will work out beautifully. This is the largest cast we have done so far, so it is definitely a challenge.

Now to relax with a good book.

Friday, June 12, 2009

The Poster has been Conquered!

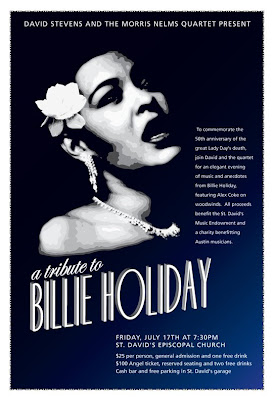
Well after two fruitless days of work I was finally able to make some real progress on the Billie Holiday poster yesterday. I learned a lot about Adobe Illustrator in the process and am very pleased with it now that I understand it better.

Illustrator has this incredibly cool function called live trace that will create a vector illustration from any photograph. I was struggling because all the photos that I had to work with were really low resolution and didn't look very good. So I ended up using the live trace to create this more subtle graphic. I then played around with the 3d effect to loft the Text at a matching angle to the edge of the illustration. This was also new territory and so I had to play around with all the settings to understand them better. Then I figured out how to use add decorative rules using the Stroke function which provided a nice subtle edging for the piece. The original background was just a simple black, but my friend wanted a little splash of color so I selected the background and added a gradient fill with the blue and I think it adds some nice dimension. The gradient is banding a little, so I'll have to work to fix that problem today.

However today I am taking a bit of a day of rest because I have been working so hard this whoe week. I plan to do a bit of gardening, taking advantage of the wet ground from the lovely rain we had last night, and then a lot of house cleaning. We finally got the grand piano that had been visiting us moved on to its permanent home and so we are planning parties for the next three saturdays. What fun!

Thursday, June 11, 2009

More Roman Breastplate

Here are some other pictures of the in progress breastplate. After I got the main form molded, then I had to figure out how to add ornamentation that would be mirrored across the sides and consistent. I ended up drawing out a design on paper and flipping it in Photoshop. I printed the design out and then formed the clay into tubes and followed withing the lines. After I had the design, it was a pretty simple matter to position it on the body and then use a tool to meld the edges and smooth it out. I'm very pleased with the results and can't wait to cast it tonight.

The second project I am working on is a poster for a Billie Holiday concert. Unfortunately it is not progressing nearly as well as this project. sigh...

Wednesday, June 10, 2009

Making Roman Armor

Having finished my round of concerts that were eating up so much of my time, I am now getting to enjoy my days again. I have been puttering with many things. I'm continuing to improve my play proposal since it looks as though it will be at least a month before I find out if I get it. 

I am also starting some drawings from a friend of mine who is a science fiction and fantasy author. She wants to get some drawings of the characters from her new book for her website. I don't really know if I am a good enough artist to pull it off, but she has given me till the end of June to try. Here is the first in progress sketch. This is a character names Dorrin Verrakai
I am also starting the great costume push for the Baroque Opera at Amherst Early Music Festival. This year we are doing Dioclesian by Henry Purcell which has about every fantastic Purcell song in it. It is all Roman Costumes this year, which should be a lot of fun.

The first thing I am tasked with making are some Roman breastplates. I am going to try to make them using the same technique I have been using for the Leather Masks, where I cast a negative form and then mold the leather into it. Here are some pictures of the in progress clay sculpture. The first stage was just laying down the shapes and the second was refining them.


Friday, June 5, 2009

Puck Sketch

Here was yesterday's sketch. This one went a lot faster, both in the actual sketching on paper and in the painting in Photoshop. I think I am getting better. I found a ton of painting tutorials on Youtube that I am enjoying watching which will hopefully make the process even easier.

I also have a sketch of Bottom and Titania in process, and then I think I only have to do one of the Rude Mechanicals in the midst of their play and that will probably be enough to convey the feel of the play.

Thursday, June 4, 2009

More Midsummer Sketches

I have been happily working away on the laptop with the Wacom tablet having a lot of fun with these production drawings for my play proposal. It really is amazing how I am growing as an artist now that I don't have the pressure of having to make a living at it. Now if I can only achieve some of the amazing facility of some of the computer painters out there that I admire.

So here are some sketches of my Lovers in their undress, and of Oberon's Unseelie court. As a point of interest I have included the original pencil drawing before it gets taken into to Photoshop and painted.